|
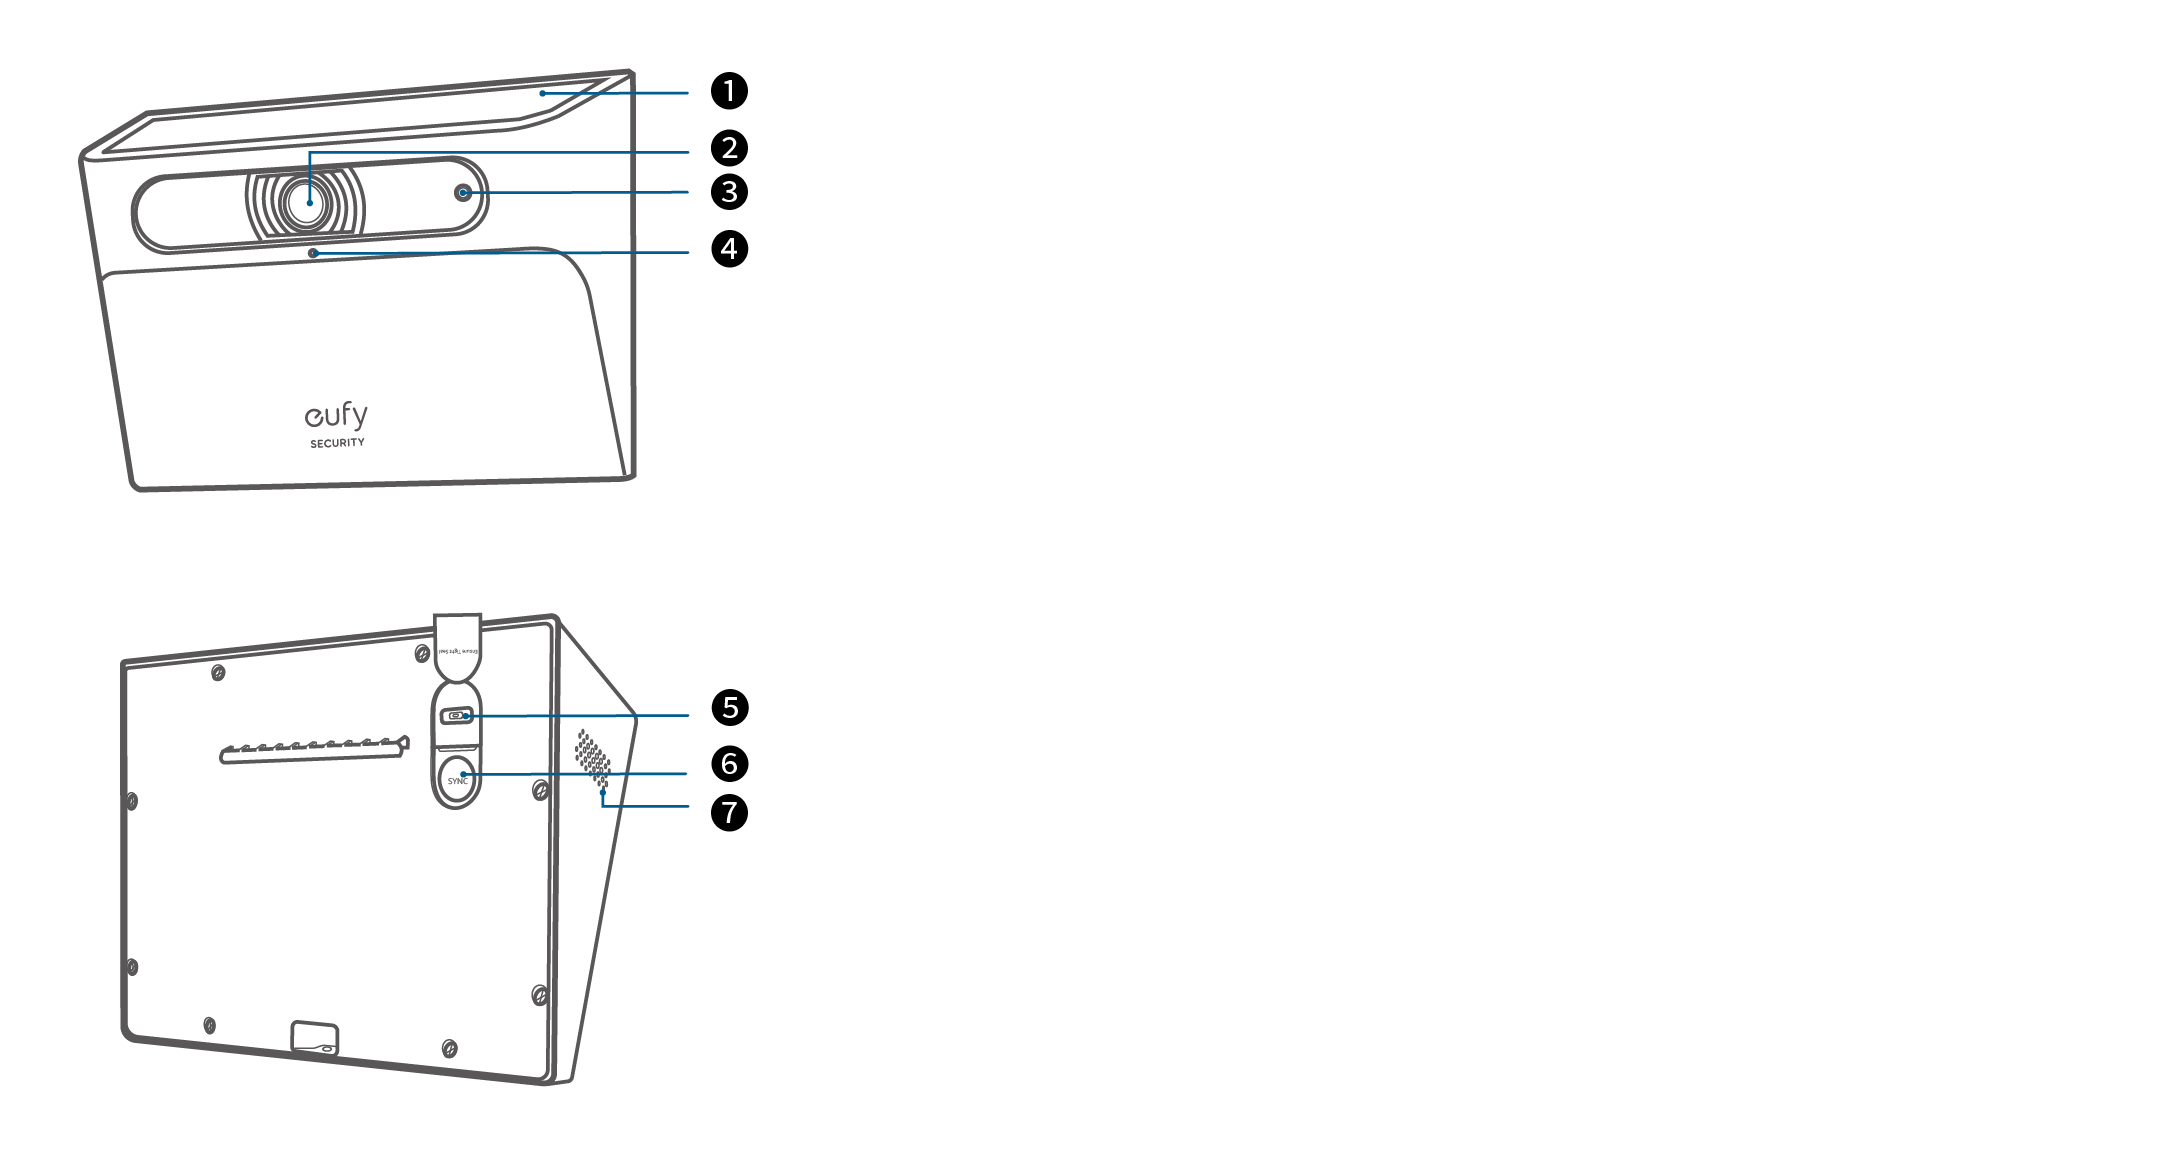
❶ |
Solar Panel |
|
❷ |
Camera |
|
❸ |
LED Indicator |
|
❹ |
Microphone |
|
❺ |
USB-C Charging Port |
|
❻ |
SYNC Button |
|
❼ |
Speaker |



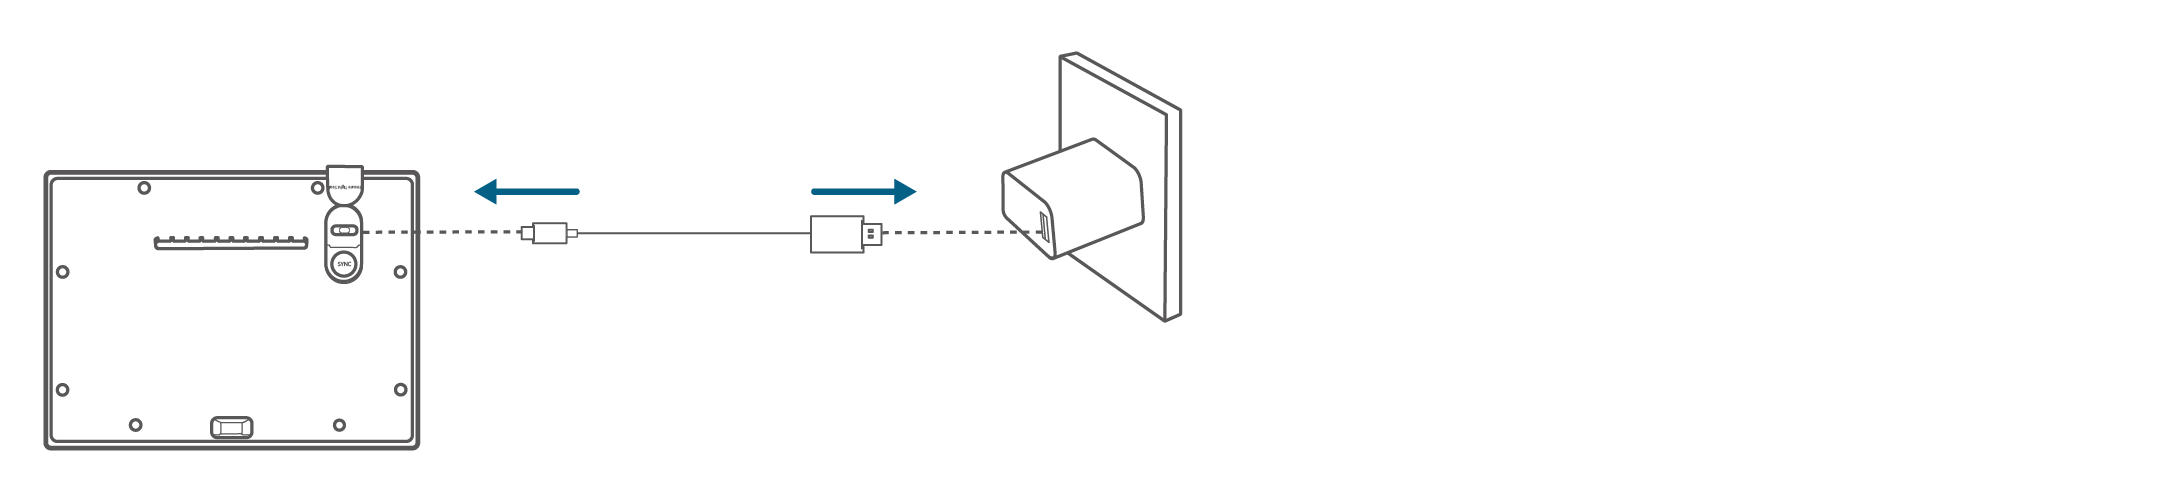
Note: A standard USB-C charging cable (not included) and AC adapter (not included) are required for charging. Fully charge before first use.
1. Download and install the eufy Security app, and sign up for an account.
2. Follow the in-app instructions to add your Solar Wall Light Cam.
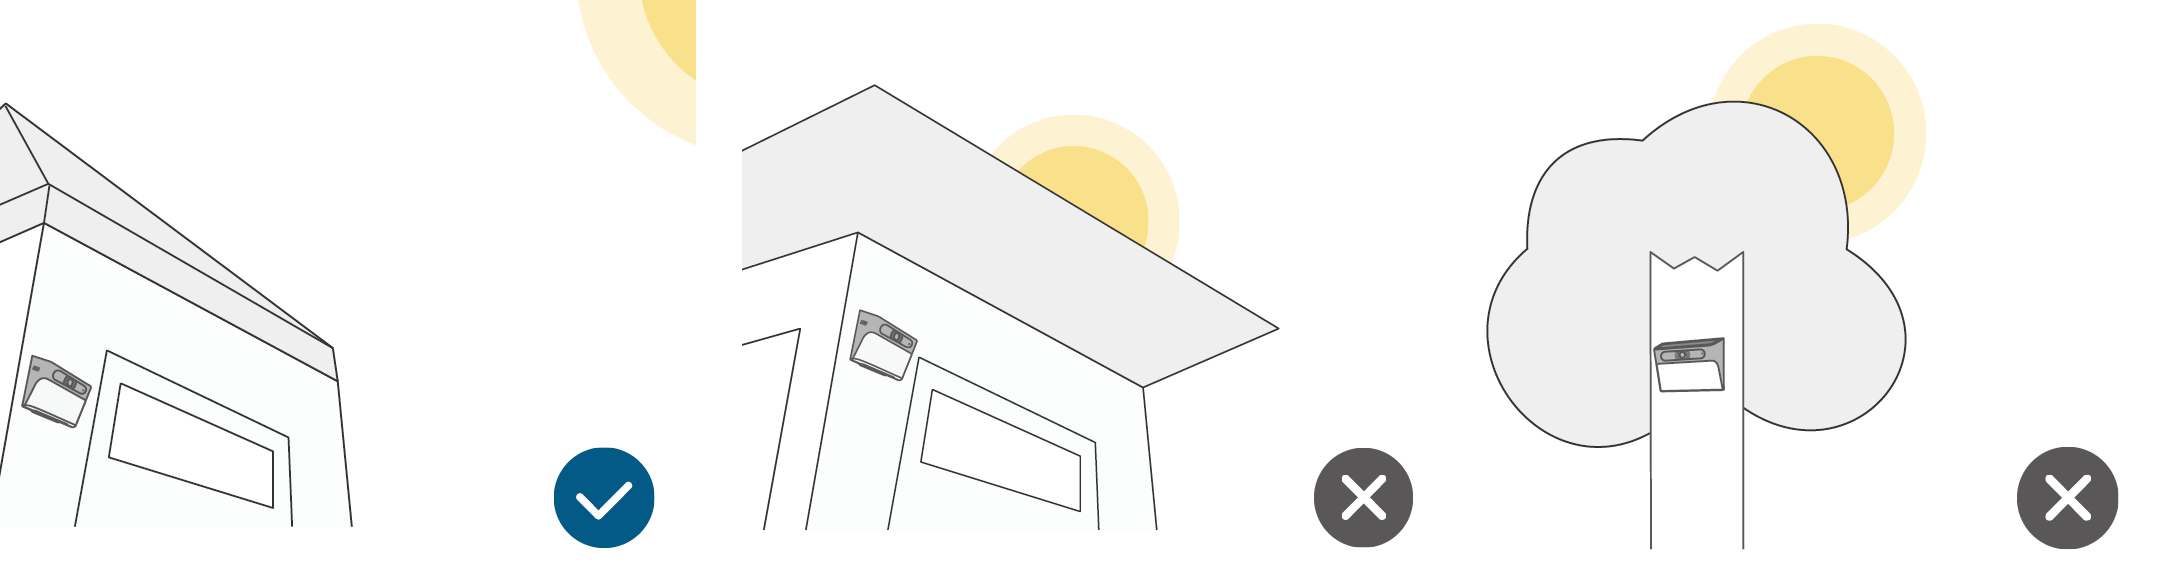
The camera can be mounted on a wall or similar surface. Select a location where the solar panel will not be blocked by obstacles such as a roof or leaves.

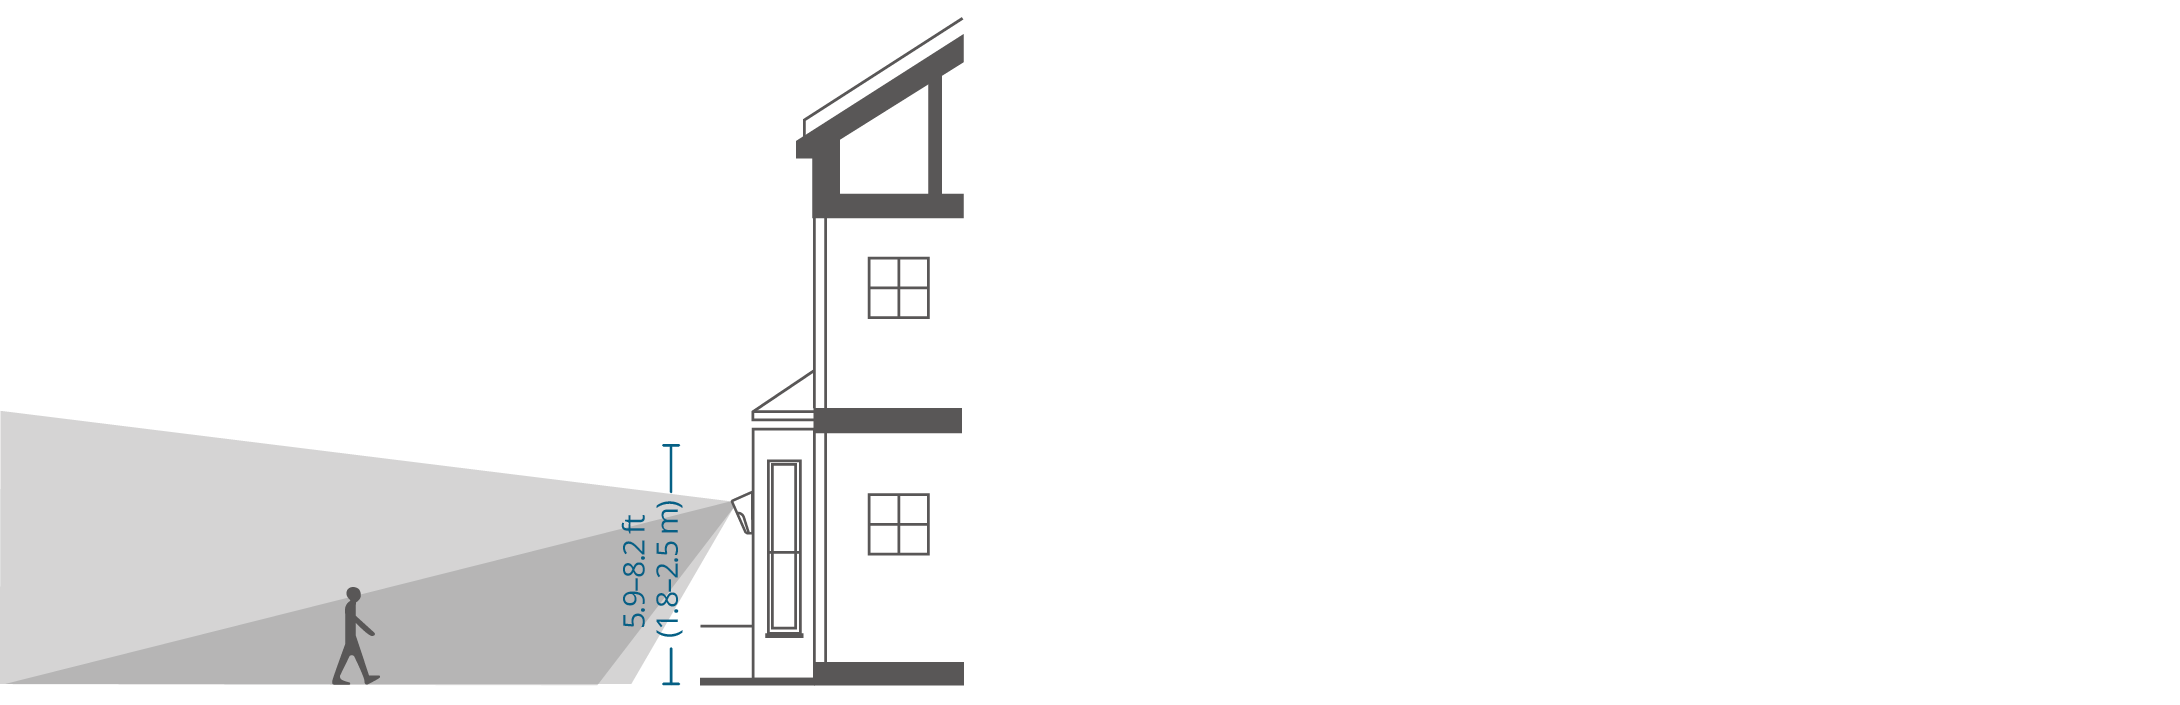
We recommend mounting 1.8 m - 2.5 m (5.9 ft - 8.2 ft) above ground level.

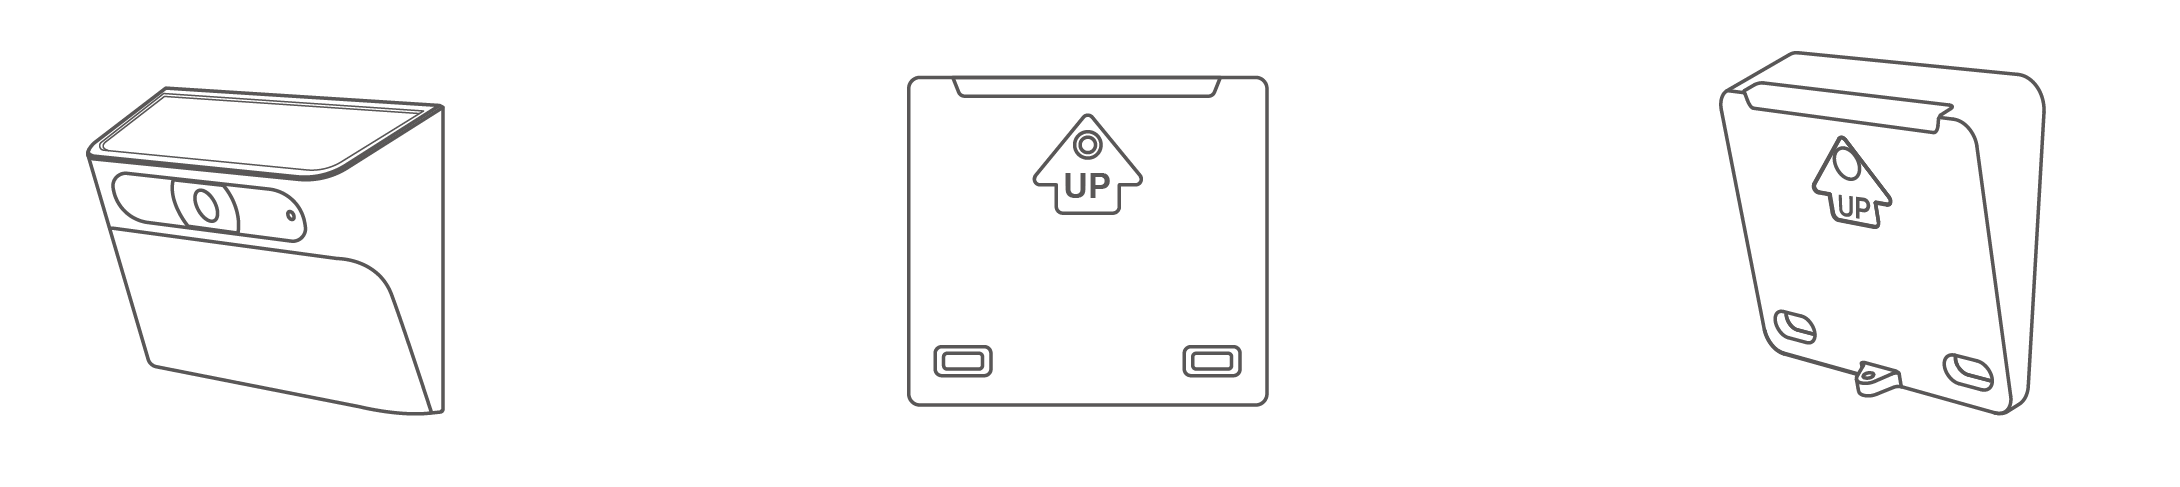
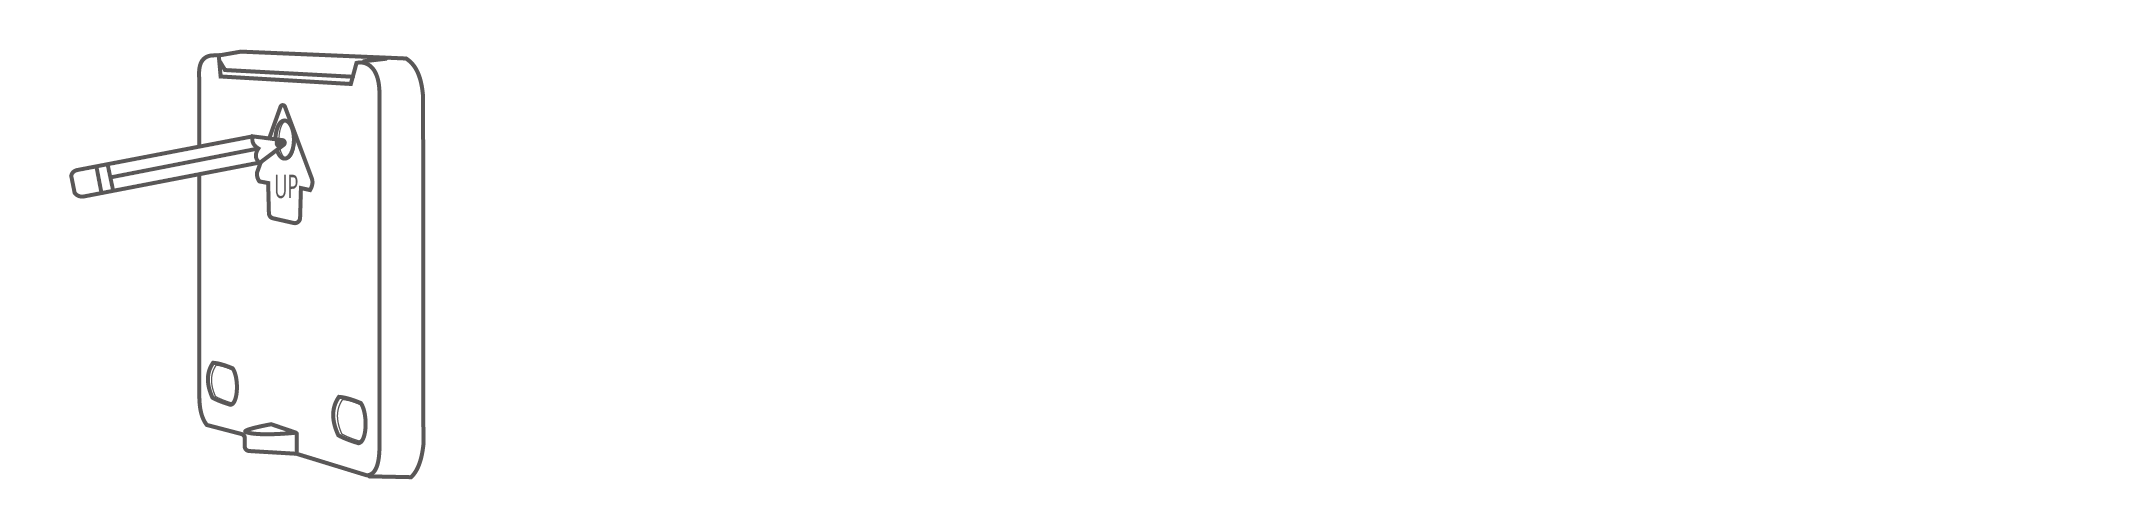
1. Mark the mounting points on the wall or surface where drilling will be required, using the mounting base as a template.

2. Drill holes in the wall or surface, then insert the expansion anchors into the holes.

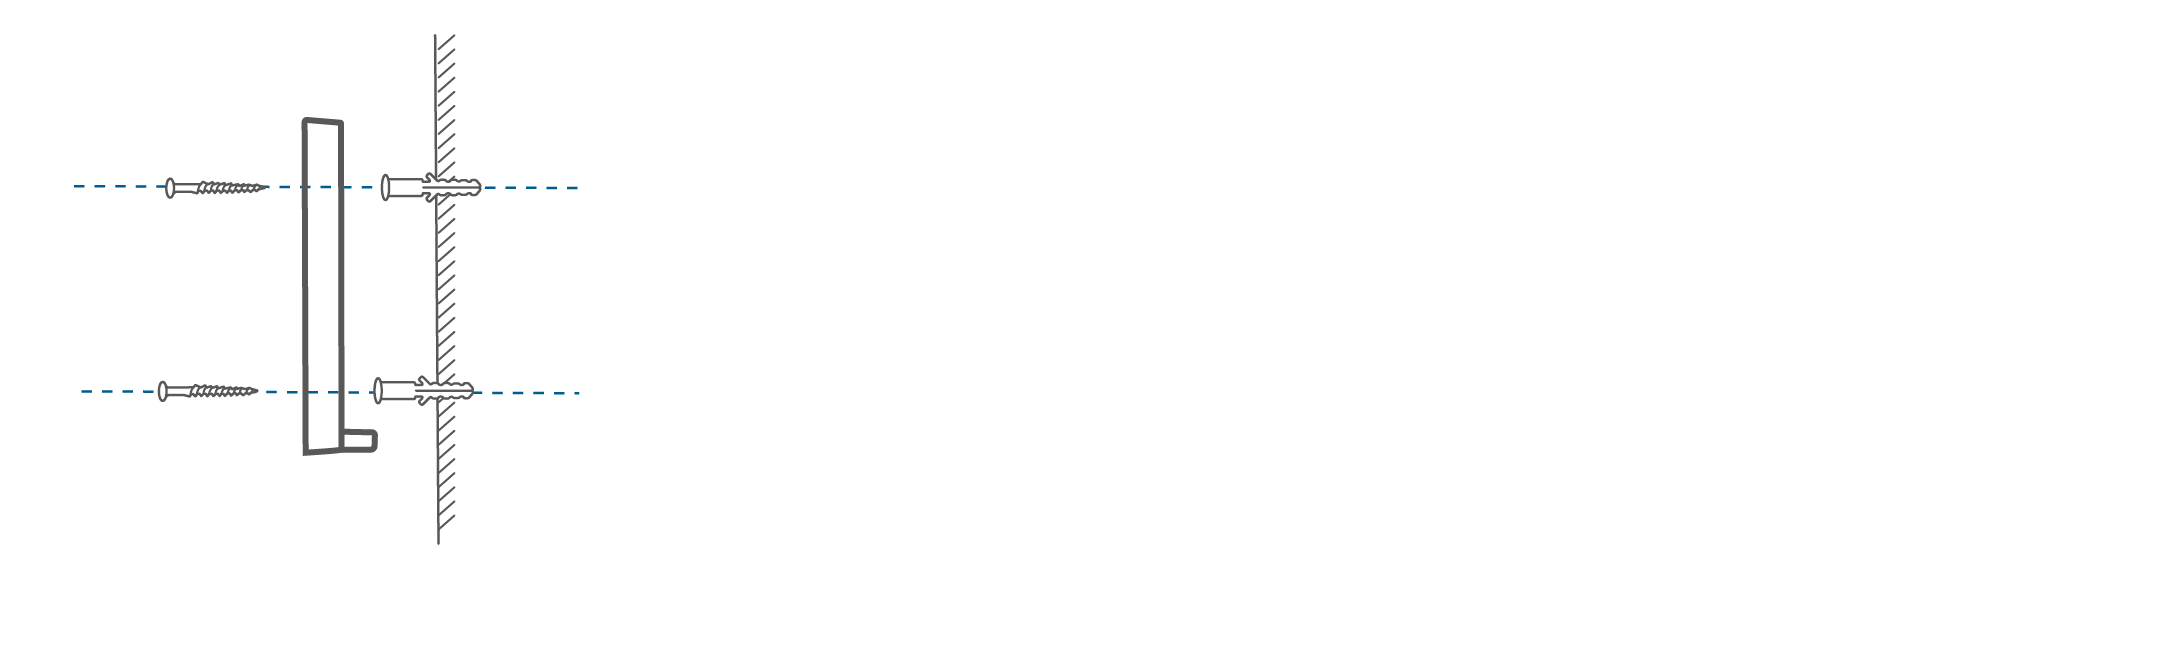
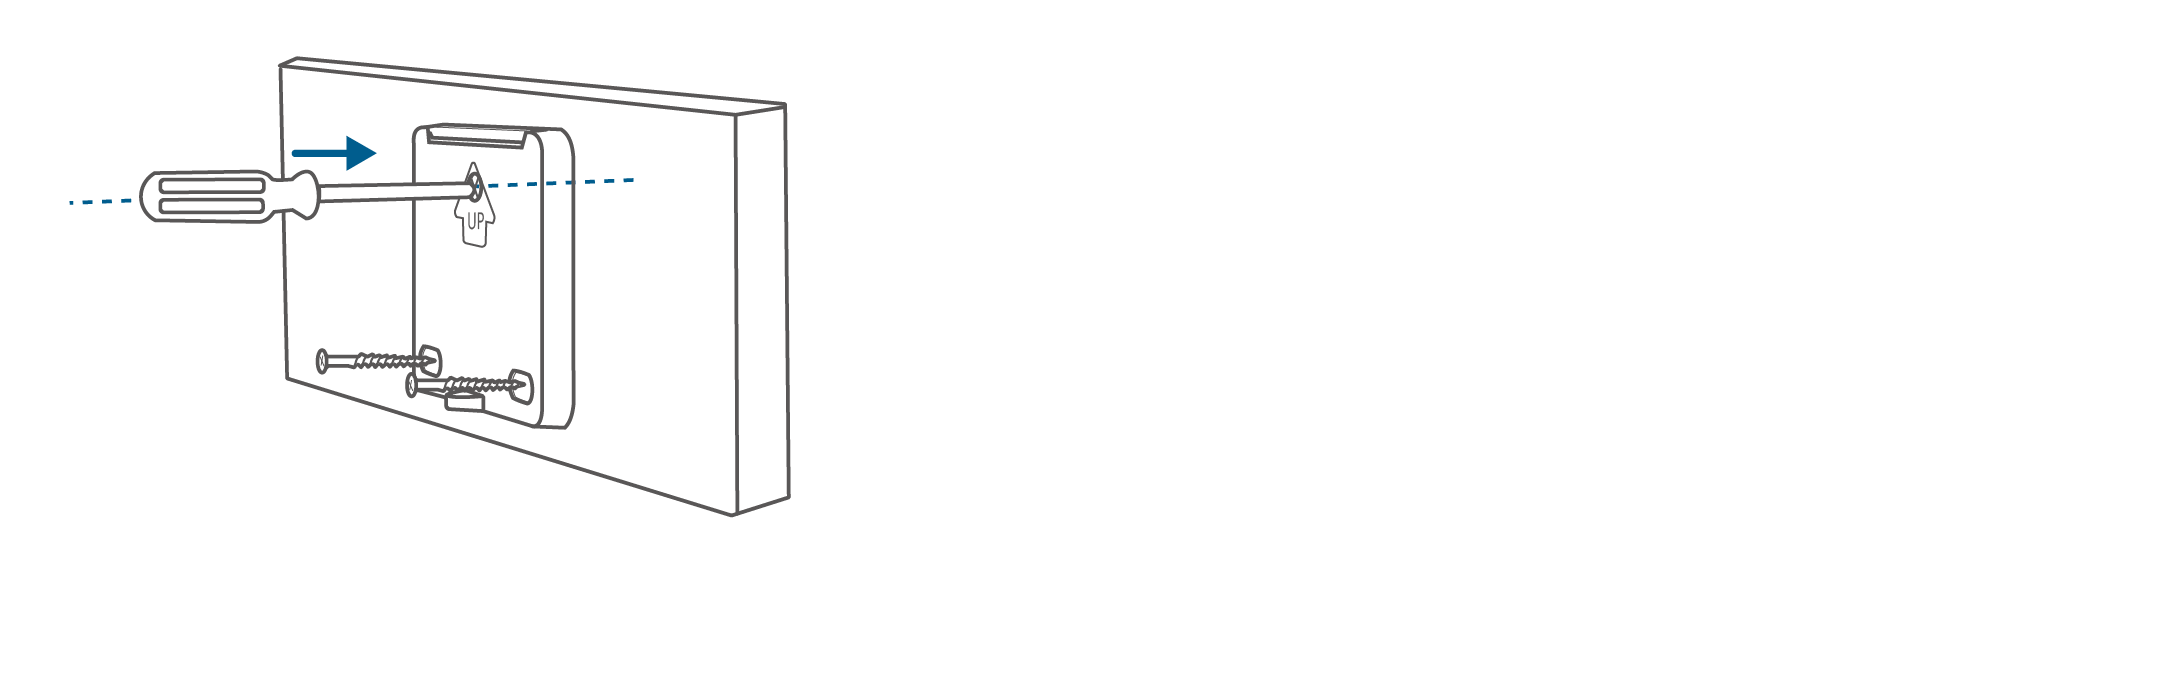
3. Screw the mounting base onto the wall.
4. Slot the camera onto the mounting base and make sure it is attached securely.
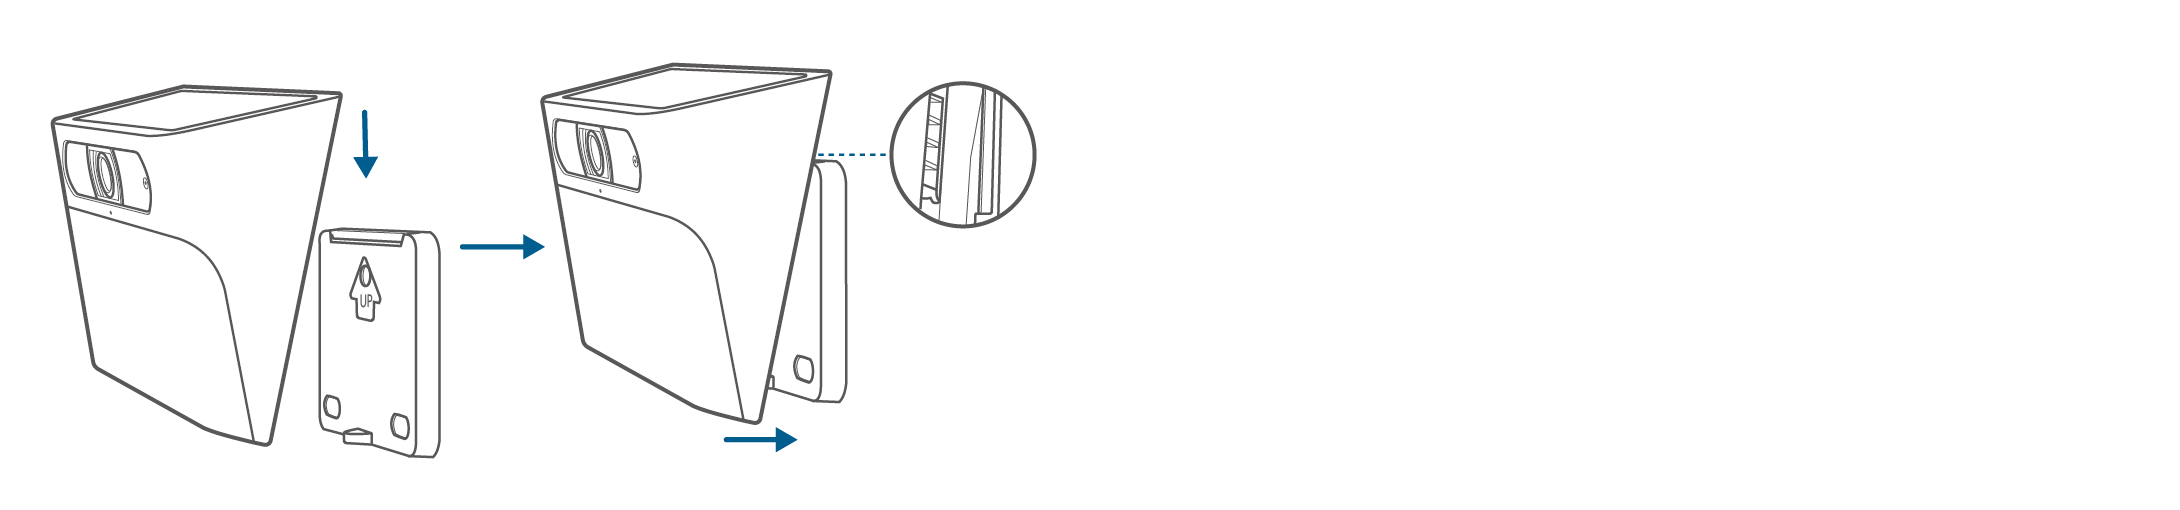
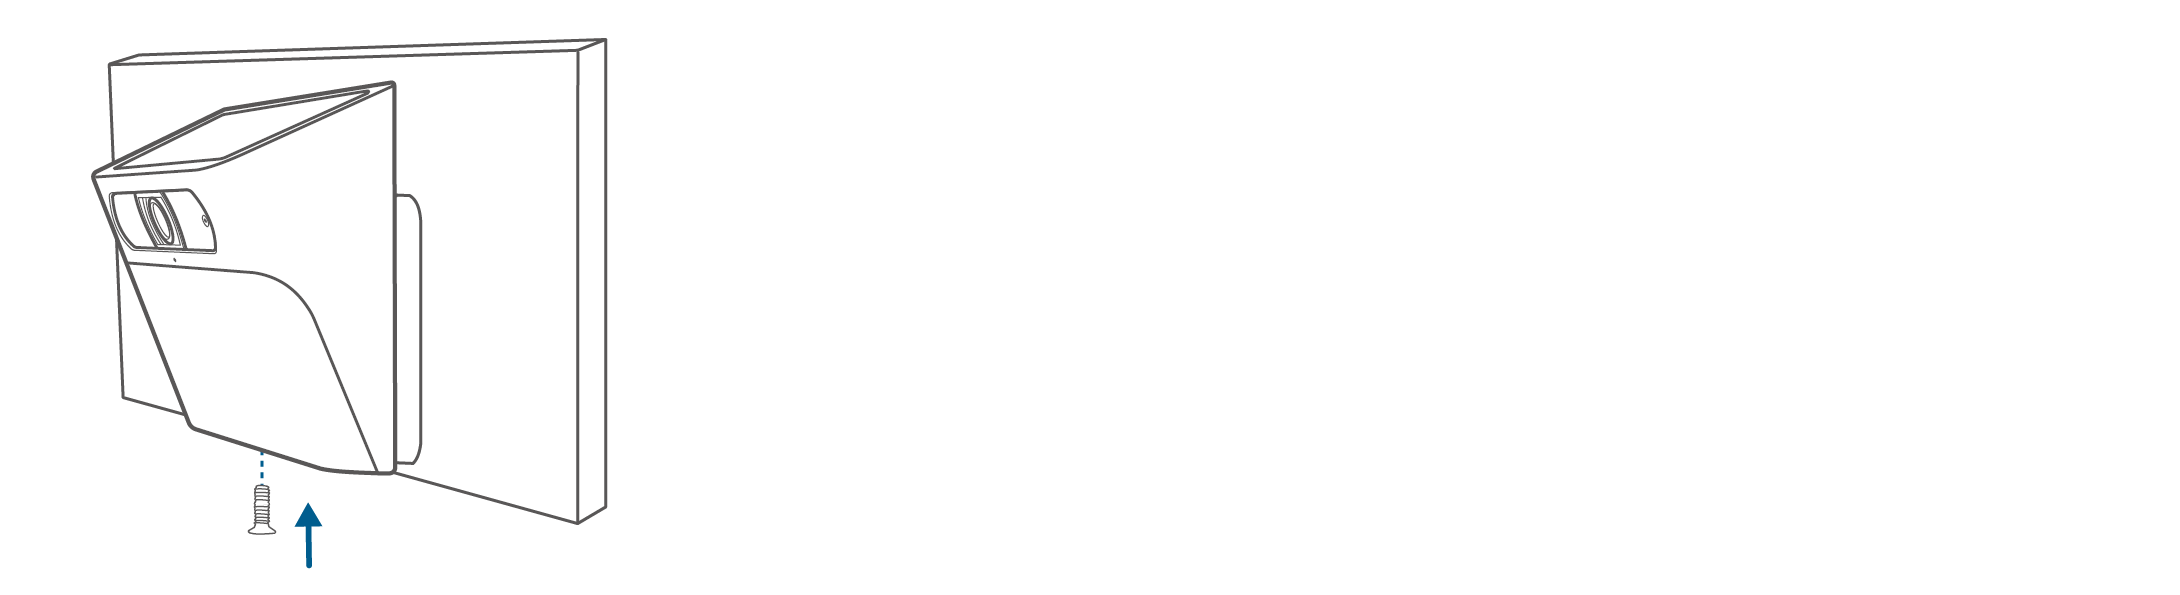
5. Insert and tighten the camera fixing screw at the bottom of the camera.