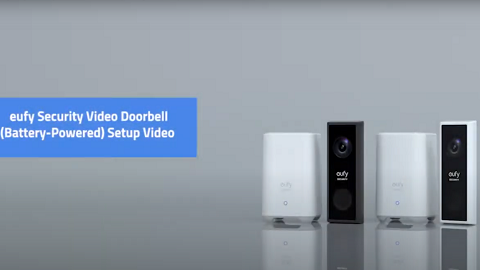
Determining the Power Option
Option 1: Battery Powered
If you don't have existing doorbell wiring at your front door, use the included battery. You are free to determine the location of the doorbell, and the mounting will be easy and quick.
When the battery is low, you will need to recharge it. Battery life varies with use. If you choose this option, please skip to DOORBELL MOUNTING (Battery Powered).
Option 2: Wire Powered
If you have existing and working doorbell wires at your front door, the video doorbell will be constantly powered by these wires. So there's no need to detach and recharge after installation.
The mounting position is limited. If you choose this option, please skip to DOORBELL MOUNTING (Wire Powered).

Doorbell Mounting (Battery Powered)
Choose a Location
1. Take the video doorbell to your front door and check the live view in the app. Choose a location where you can see the desired field of view. Consider the following factors:
• Check if you can reuse the existing holes and anchors in the wall or door frame.
• If you want to place the doorbell near a side wall, make sure the wall isn't in the field of view. Otherwise, the IR light will be reflected and the night vision will be blurred.
• If you are drilling the mounting holes for the first time, the recommended height is 48" (1.2m) above the ground.
• To adjust the angle, use the 15º mounting wedge as a supplementary mounting bracket.


2. Place the screw hole positioning card against the wall to mark the location. If mounting on a hard wall (brick, concrete, or stucco), use a 15/64" (5.95mm) drill bit to drill 2 holes through the screw hole positioning card.

💡 What you need: Phillips-Head Screwdriver; Power Drill (15/64" Drill Bit)
Mount the Bracket
Use the provided screws to secure the mounting bracket on
the wall.
Wooden Wall

Hard Wall

Install the Doorbell
Align the doorbell with the bottom of the mounting bracket, then press the top of the doorbell into place until it clicks.

Recharging the Battery
1. Insert the detaching pin into the pin hole on the top of
the doorbell, then lift the top for removal.

2. Repeat steps in "CHARGING THE BATTERY PACK". You can purchase an extra battery pack for quick replacement.
Doorbell Mounting (Wire Powered)
Check the Doorbell Wires
1. Ring the existing doorbell to check if it is working. If it doesn't ring, your doorbell wires may be defective. Power on the doorbell by the built-in battery or consult an electrician to repair the wires.
2. Shut off the power at the circuit breaker. Turn the lights
on and off to make sure the electricity in your home is
properly shut off.

📌Always be careful when handling wires. If you're not comfortable installing it yourself, have a qualified electrician to do it.
Detach the Existing Doorbell Button
If you already have existing doorbell wiring:
1. Remove the existing doorbell button with a Phillips-head screwdriver (not provided).
2. Pull the two wires out carefully when removing the existing doorbell. Straighten the wire ends if necessary.


Choose a Location
1. Take the video doorbell to your front door and check the live view in the app. Choose a location where you can see the desired field of view. Consider the following factors:
• Check if you can reuse the existing holes and anchors in the wall or door frame.
• If you want to place the doorbell near a side wall, make sure the wall isn't in the field of view. Otherwise, the IR light will be reflected and the night vision will be blurred.
• If you are drilling the mounting holes for the first time, the recommended height is 48" (1.2m) above the ground.
• To adjust the angle, use the 15º mounting wedge as a supplementary mounting bracket.


2. Place the screw hole positioning card against the wall to mark the location. If mounting on a hard wall (brick, concrete, or stucco), use a 15/64" (5.95mm) drill bit to drill 2 holes through the screw hole positioning card.

💡 What you need: Phillips-Head Screwdriver; Power Drill (15/64" Drill Bit)
Mount the Bracket
Use the provided screws to secure the mounting bracket on
the wall.
Wooden Wall
Hard Wall
Connect the Wires to the Doorbell
Connect the wires to the terminals on the back of the doorbell, then tighten the terminal screws. Wire can be connected to any terminal.


📌To prevent short-circuiting, make sure the wires are not touching each other after connecting them to the terminals. If the wires are too short, use the extension wires and wire nuts to make them longer. Use electrical wiring tape instead if there is no more space on the wall for wire nuts.
Install the Doorbell
Align the doorbell with the bottom of the mounting bracket, then press the top of the doorbell into place until it clicks.

Restore Power
Switch the main circuit breaker back to ON. You're all set!

If you have any other questions, please don't hesitate to reach out to us for further assistance.